Agricultural Literacy Curriculum Matrix
Companion Resource

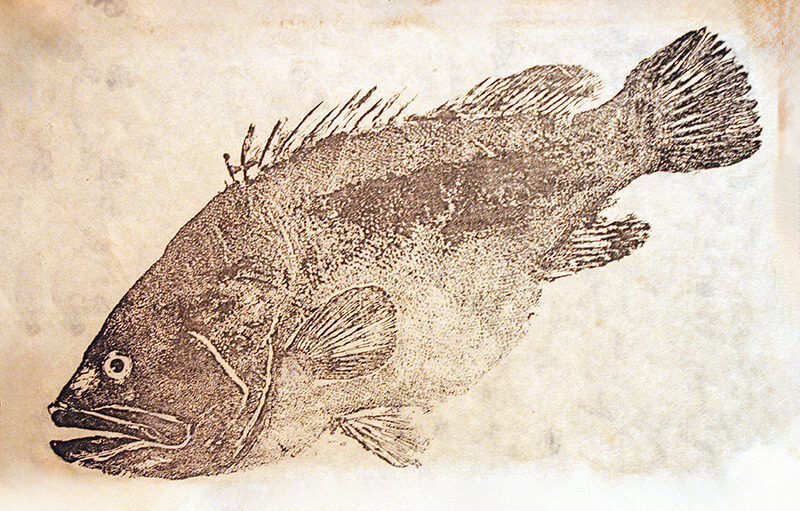
Gyotaku: The Japanese Art of Printing Fish
In this activity the students will identify the parts and functions of a fish, explore the Japanese art of fish printing known as gyotaku, and label their gyotaku print with the parts of a fish.
Materials
- Parts of a Fish PowerPoint
- Gyotaku: The ancient Japanese art of printing fish video
- Fish (whole), 1 per group (fish can be fresh-caught or obtained from a grocery store or fish market; replicas are also available online by searching "rubber fish printing replica")
- Black Sumi or block ink (available at art or craft stores)
- Soft paint brush, 1 per group
- Paint rag, 1 per group
- Rice art paper, 1 per person (available at art or craft stores)
- Modeling clay
Procedures
- Use the Parts of a Fish PowerPoint to introduce the parts and functions of a fish. The species pictured in the PowerPoint is a Blue Tilapia. Tilapia are a fish commonly raised in aquaponics systems because of their heartiness. They are resistant to disease and parasites and can handle a wide range of water quality and temperature challenges. They are also easy to breed and grow to maturity quickly.
- View the video Gyotaku: The ancient Japanese art of printing fish. Explain to the students that they are going to create a gyotaku print and then label the parts of a fish on the print.
- Organize the students into small groups. Provide each group with a fish, ink, a paint brush, and a rag. Pass out a piece of rice art paper to each person. Model the gyotaku process for the class using the following instructions:
- Place clay under any fins that need support.
- Use the paint brush to apply ink to the fish.
- Place the paper over the inked fish. Hold the paper with one hand to prevent it from slipping, and gently press the paper over the entire fish.
- Starting at one end and moving slowly across the fish, peel back the paper.
- Add any desired background details including the eye.
- Allow the print to dry.
- Wipe any remaining ink form the fish in between prints.
- After the prints have dried, students can use the Japanese Name Converter to learn how to sign their Japanese name to their artwork.
- Using the Parts of a Fish PowerPoint as a guide, have students label the appropriate parts of their gyotaku print with the parts of a fish.
File, Map, or Graphic
Author
Lynn Wallin
Organization
National Center for Agricultural Literacy (NCAL)
